INDEX
1. Storm Troopers Project03
02. Technical Breakdown04
03. Character Modeling05
04. Texturing & Shading06
05. Rigging & KineFX Workflow07
06. CFX & Vellum Dynamics08
07. USD & Solaris Pipeline09
08. Environment & Layout10
09. Render Layers & Settings11
10. AOVs & LPE Expressions12
11. Automation & Denoising13
12. Nuke Compositing & Deep Workflow14
02
04 / Shading
SURFACING
PIPELINE
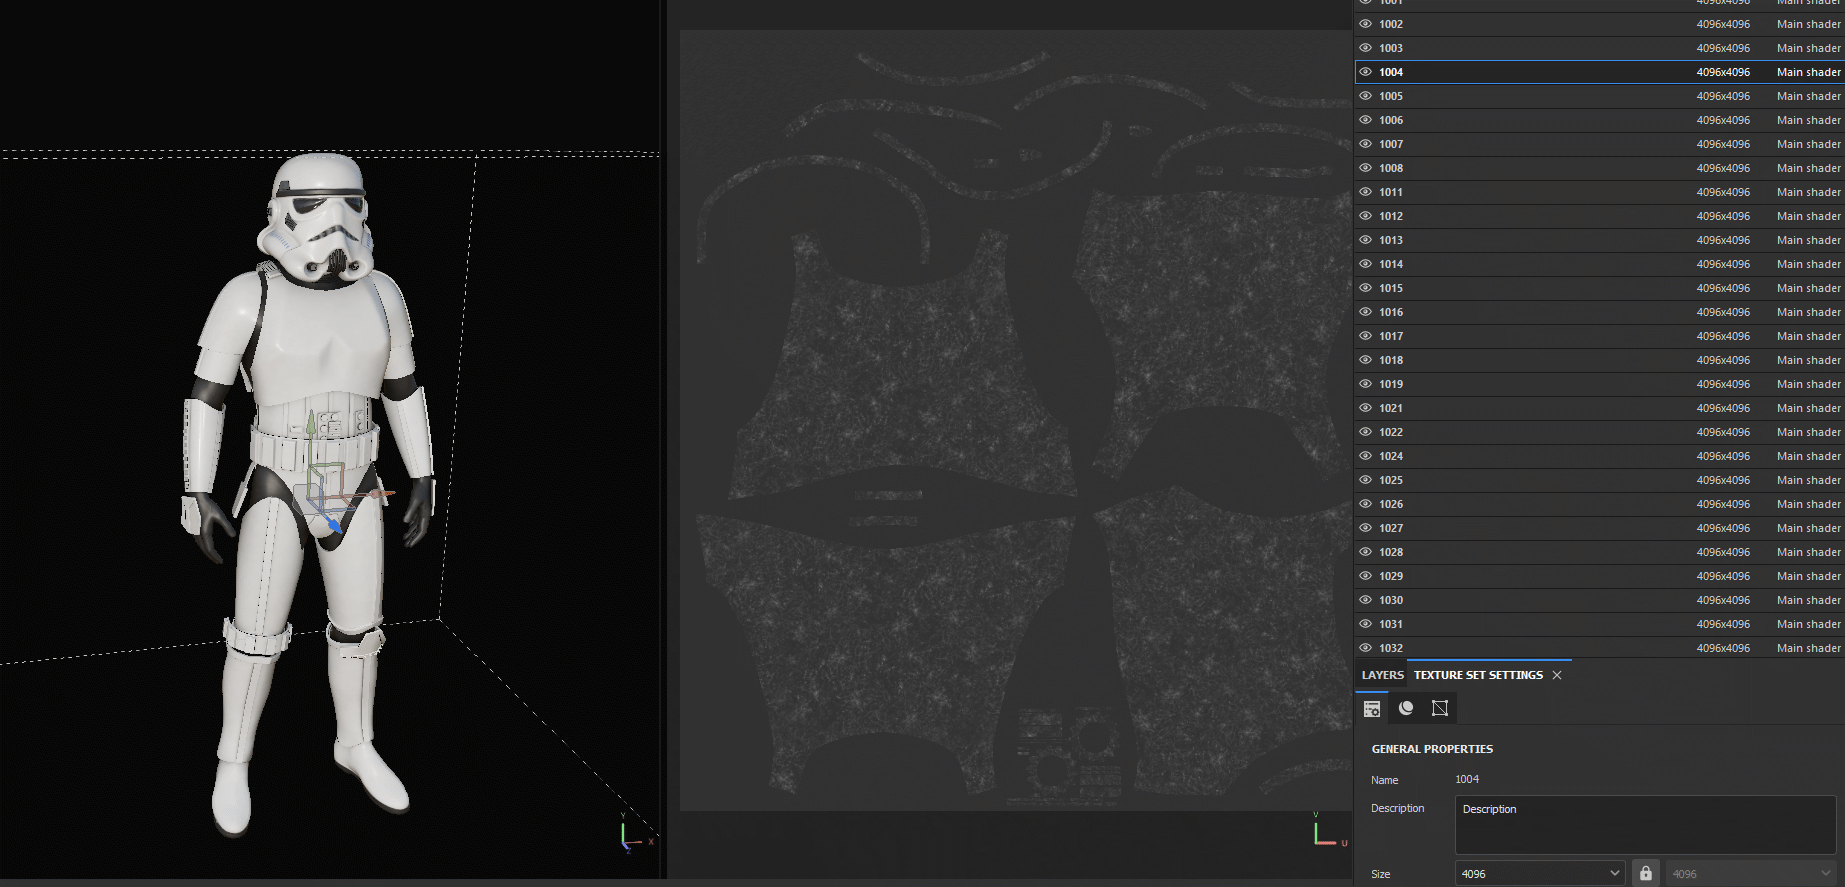
For properly detailed textures, I mostly used a UDIM-based UV workflow. A good example of this is the stormtroopers' armor pieces, which, due to their basic color, made the irregularities and noise patterns in the roughness map especially important to achieve a realistic and interesting render.
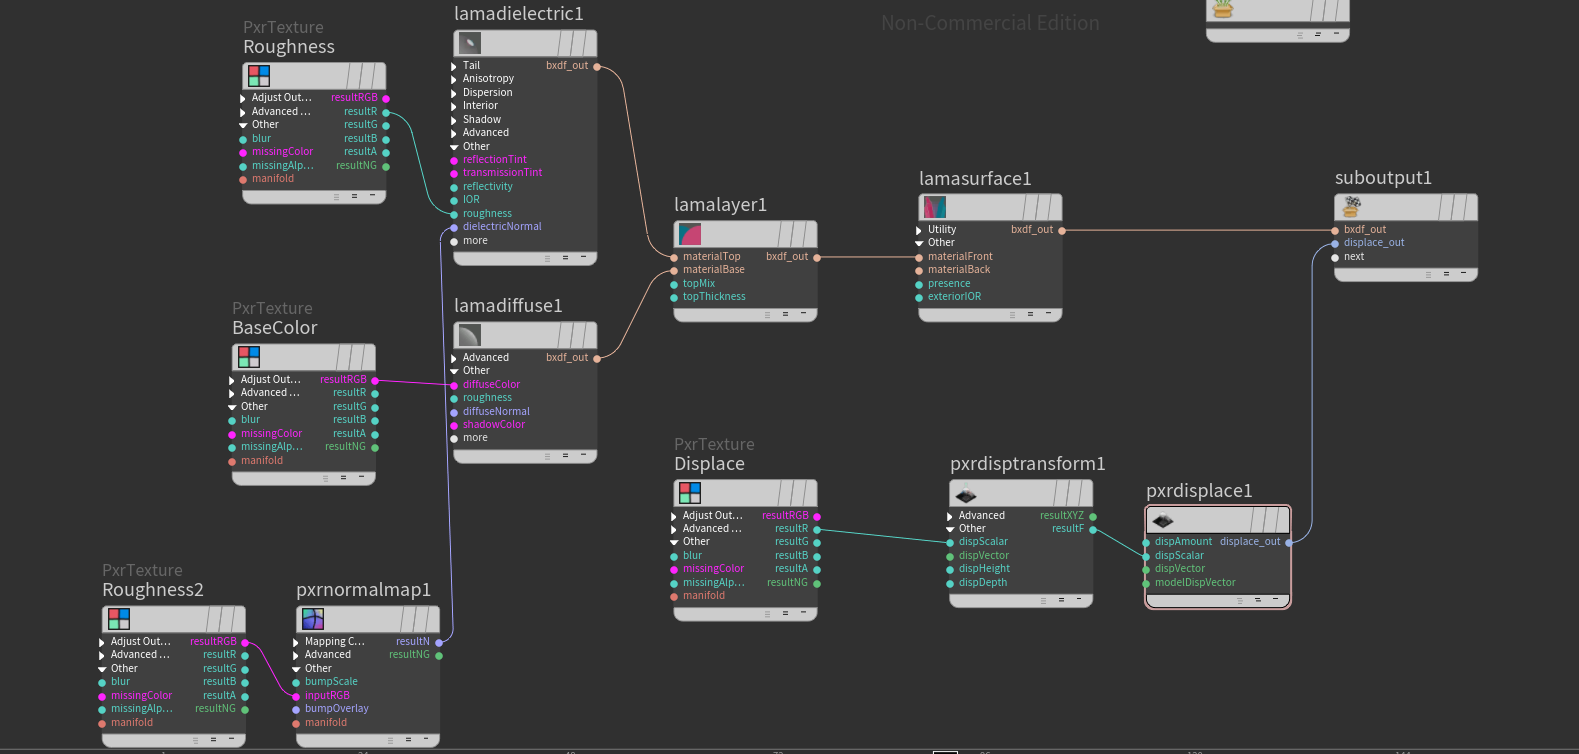
For the shaders, I used RenderMan LamaSurface. At the LOP level, I defined the USD file using the Component Builder, which serves as the cornerstone of the character asset. I really like the Component Builder because it allows for a relatively easy setup of the proper asset hierarchy and material assignment, the proxy version can be generated easily, and it almost automatically creates the payload for the USD asset. After export, we get a stormTrooper.usd file along with its corresponding payload and material USD files.
Fig. A // Substance Painter Viewport
Fig. B // Lama Node Network
06
05 / Technical Animation
RIGGING &
KINEFX
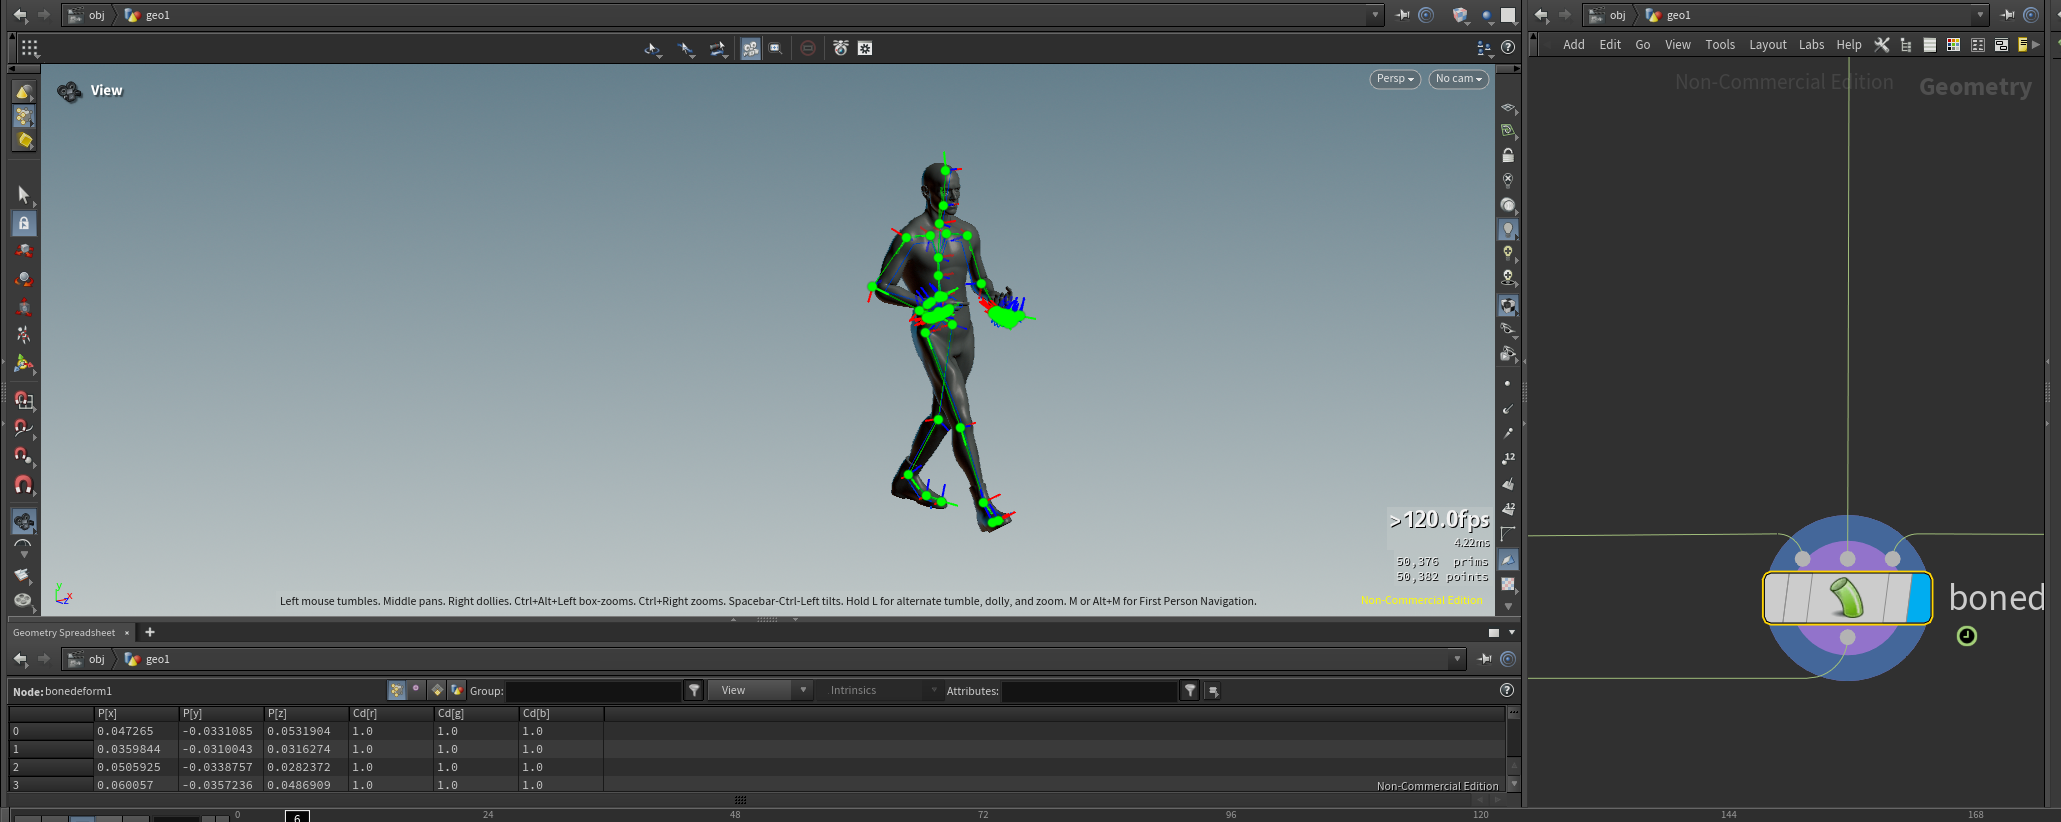
I used KineFx for the character rig. With its help, a fully usable, procedural rig can be created very quickly with minimal weight painting, which is easily modifiable thanks to Houdini's node system.
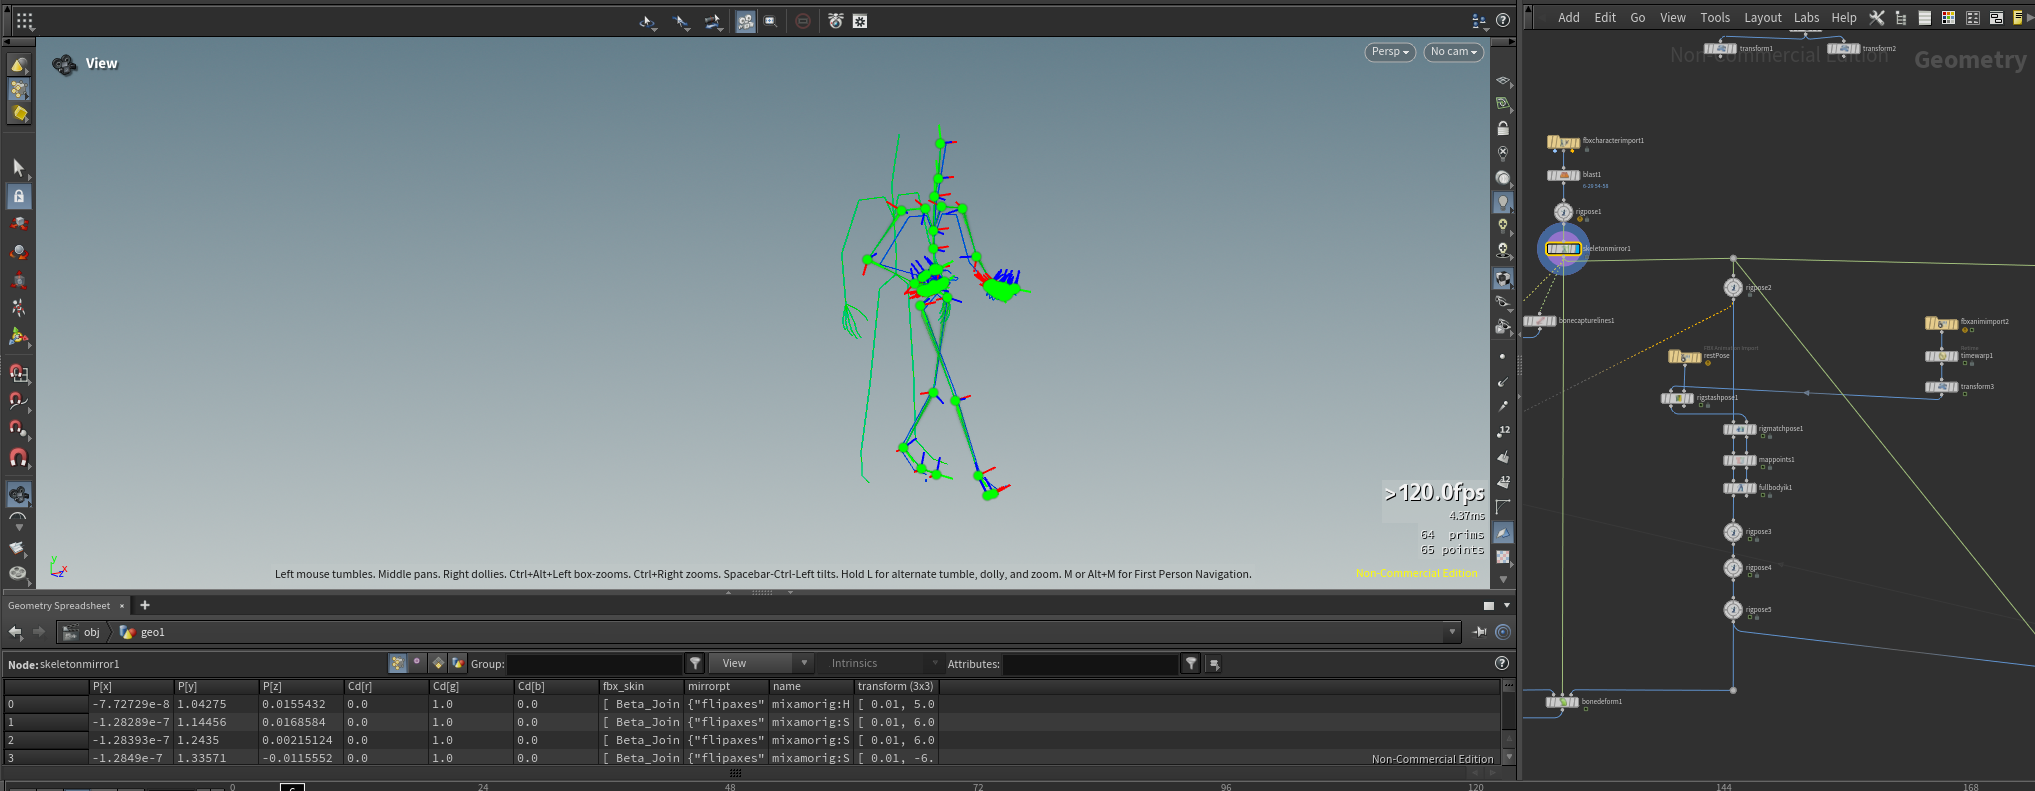
I retargeted a Mixamo-based walk cycle animation to the character's skeleton, then refined the poses using a RigPose node, and adjusted the hands appropriately to the weapon.
The USD structure required for the Solaris pipeline (the setup of prim paths) was established using a Name node at the end of the graph, thus exporting the stormTrooper_anim.usd and proxy_anim.usd cache files.
In the future, I would like to create an animation that perfectly matches the movement seen in the film using the Cascadeur software, and retarget it to the existing rig.
KineFX Node Graph // Procedural Retargeting Pipeline
Rig Viewport // Skeleton & Rig Pose Fine-tuning
07
06 / Creature FX & Dynamics
VELLUM
SIMULATION
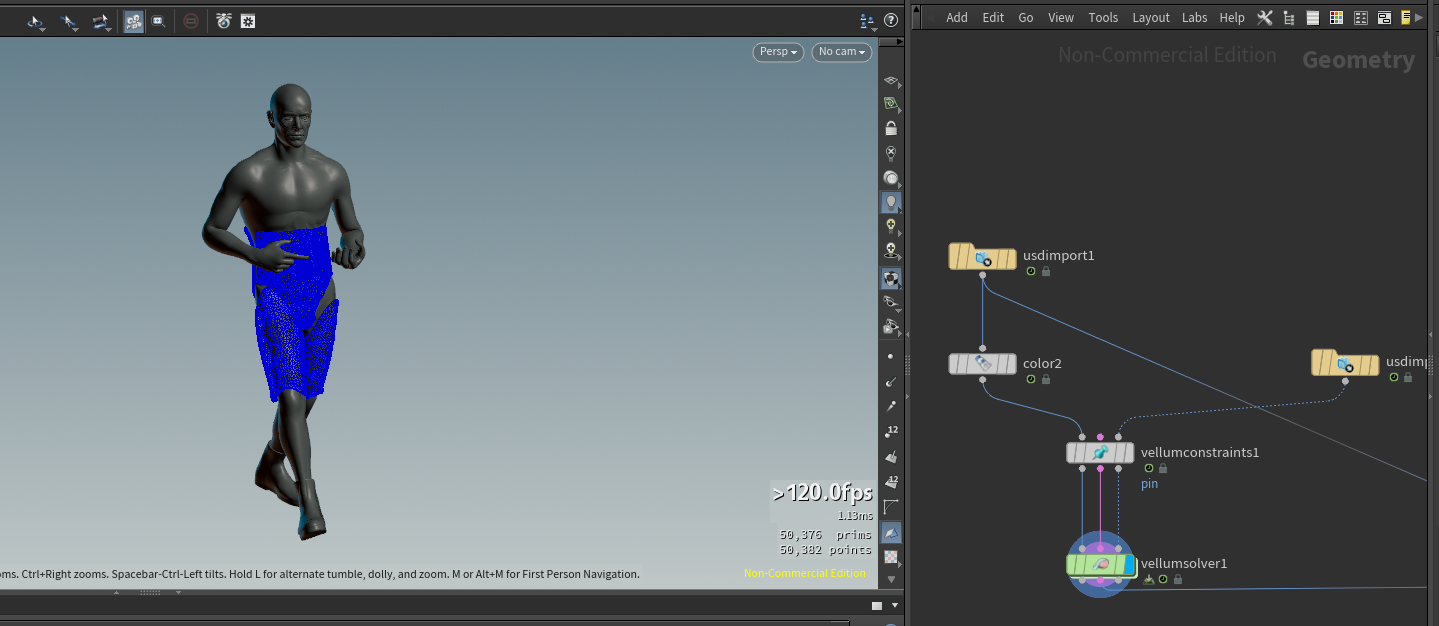
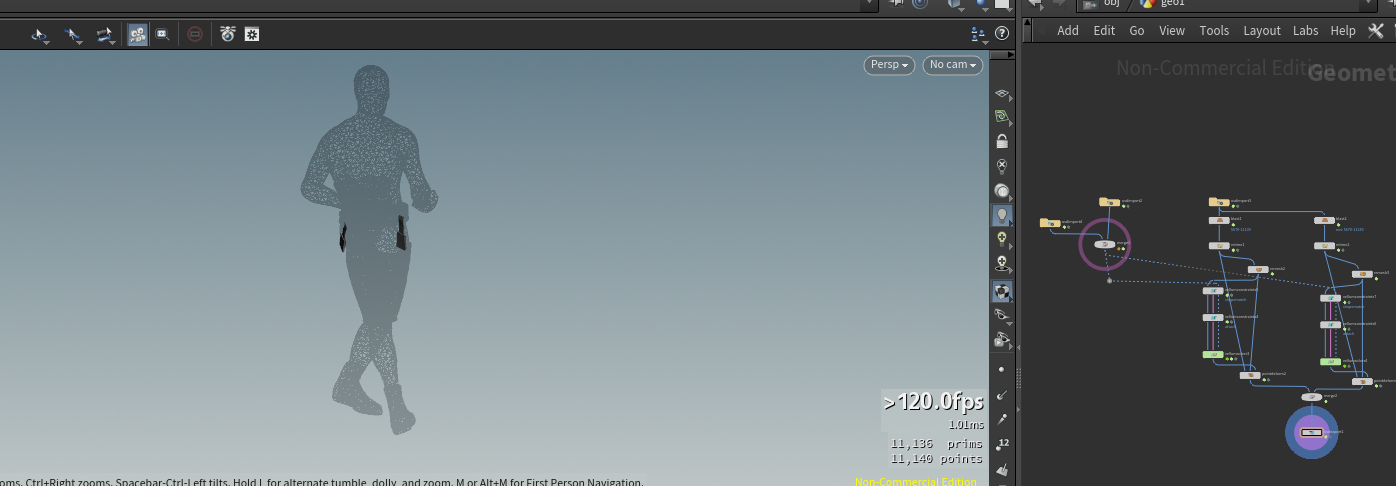
To eliminate undesirable intersections between the rigid armor elements and the body underneath, I applied a procedural Houdini Vellum setup.
The solver dynamically deforms the internal geometry at the contact points, providing fully automated and authentic collision handling throughout the entire length of the animation.
To increase physical realism, the side buckles of the armor received a dedicated Vellum simulation (secondary animation); the top parts of the buckles are constrained to the belt, so they can move freely. The simulated data was published similarly to the above, by setting the appropriate prim paths (stormTrooper_sim.usd).
Vellum Solver // Softbody Collision & Deformation
Secondary Animation // Buckle Dynamics Network
08
07 / Scene Assembly
USD &
SOLARIS
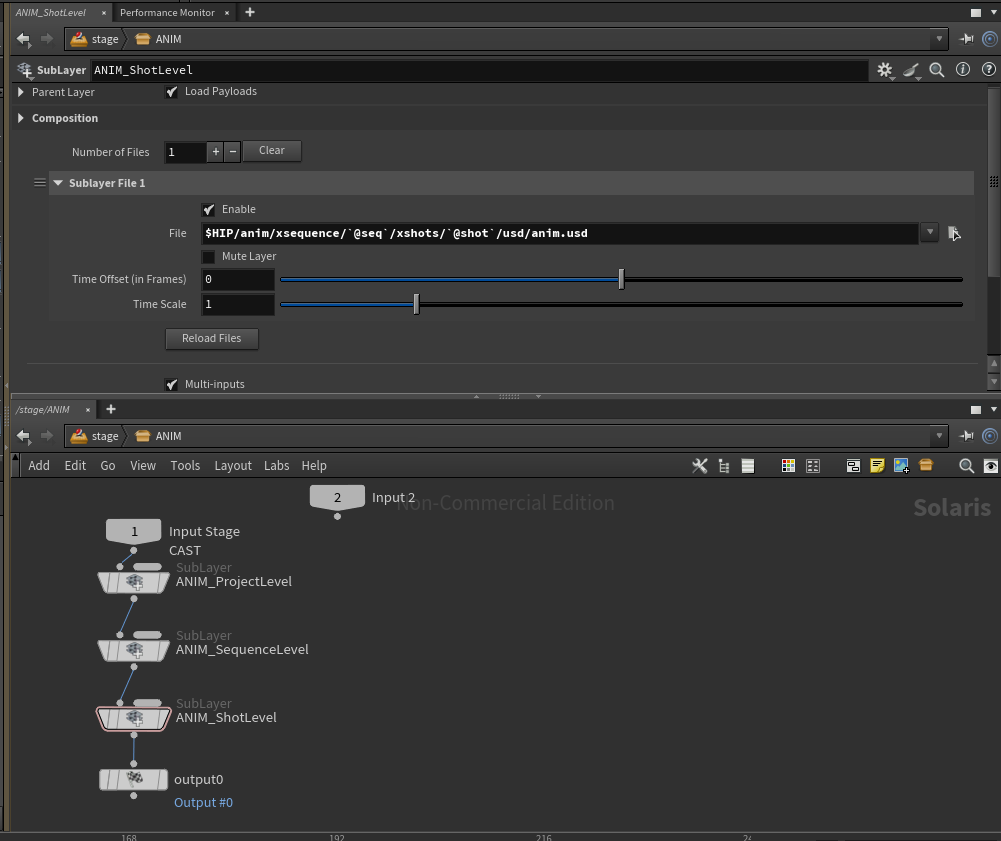
In the assembly scene, where lighting and rendering were later done, I reference the USD files using Sublayer nodes.
For the characters, this looks like first loading the shaded character in the static "A" pose created by the Component Builder, then importing the animated character's USD file over it through a subsequent Sublayer node. Since the mesh prim paths match, the animation overrides the geometry, but the material assignment remains.
If it cannot find the animation file, the system simply moves on to the next Sublayer node.
This structure creates an opportunity to parallelize workflows: lighting can begin with the static character, and the completed animation is immediately updated in the finished scene.
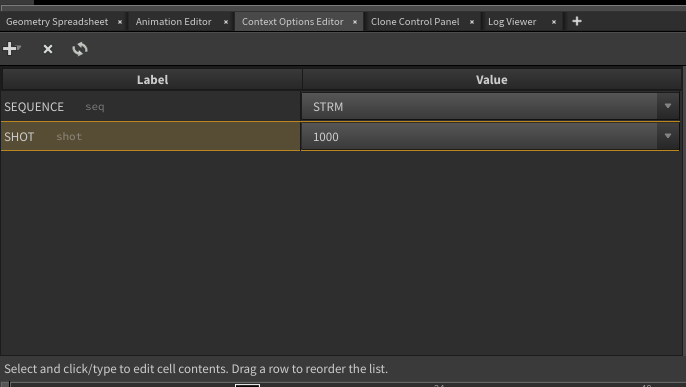
Thanks to Houdini's extremely flexible referencing and the well-defined folder structure, I can easily create project, sequence, and shot-level overrides.
Fig. A // Sublayers in Subnetworks to manage level hierarchy
Fig. B // Context Options Editor
08 / Environment & Layout
ENVIRONMENT
& OPTIMIZATION
I built the foundation of the environment from simple primitives using hard-surface modeling; the textures were created in Substance Painter, then shaded with Component Builder and exported to USD format.
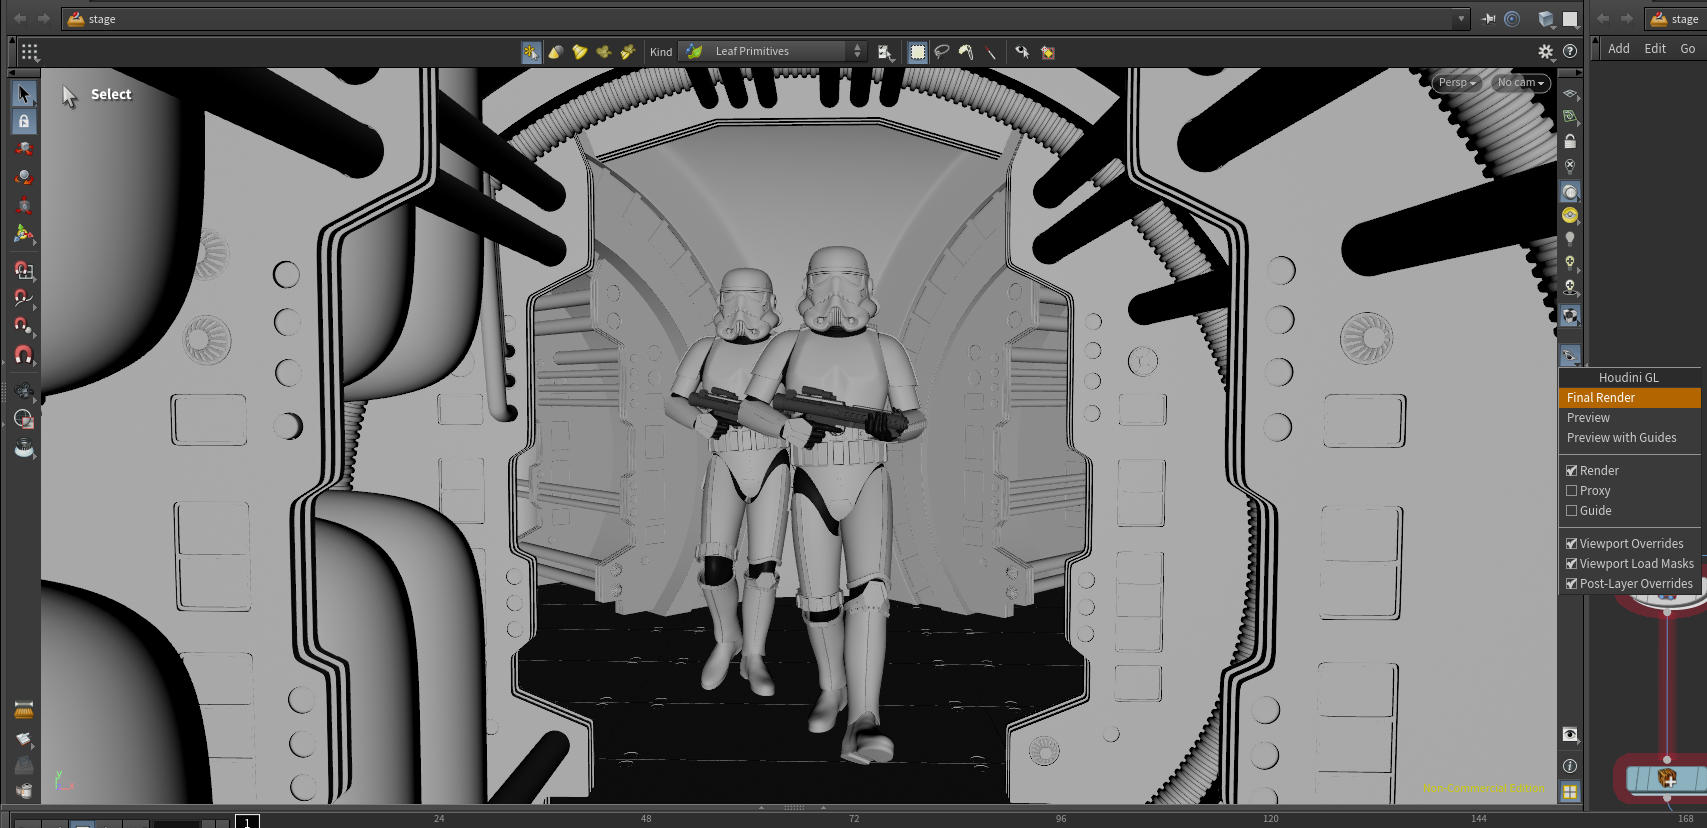
Since complex geometries would have overloaded the system when assembling the final scene, managing geometry payloads in the Solaris environment became a critical step.
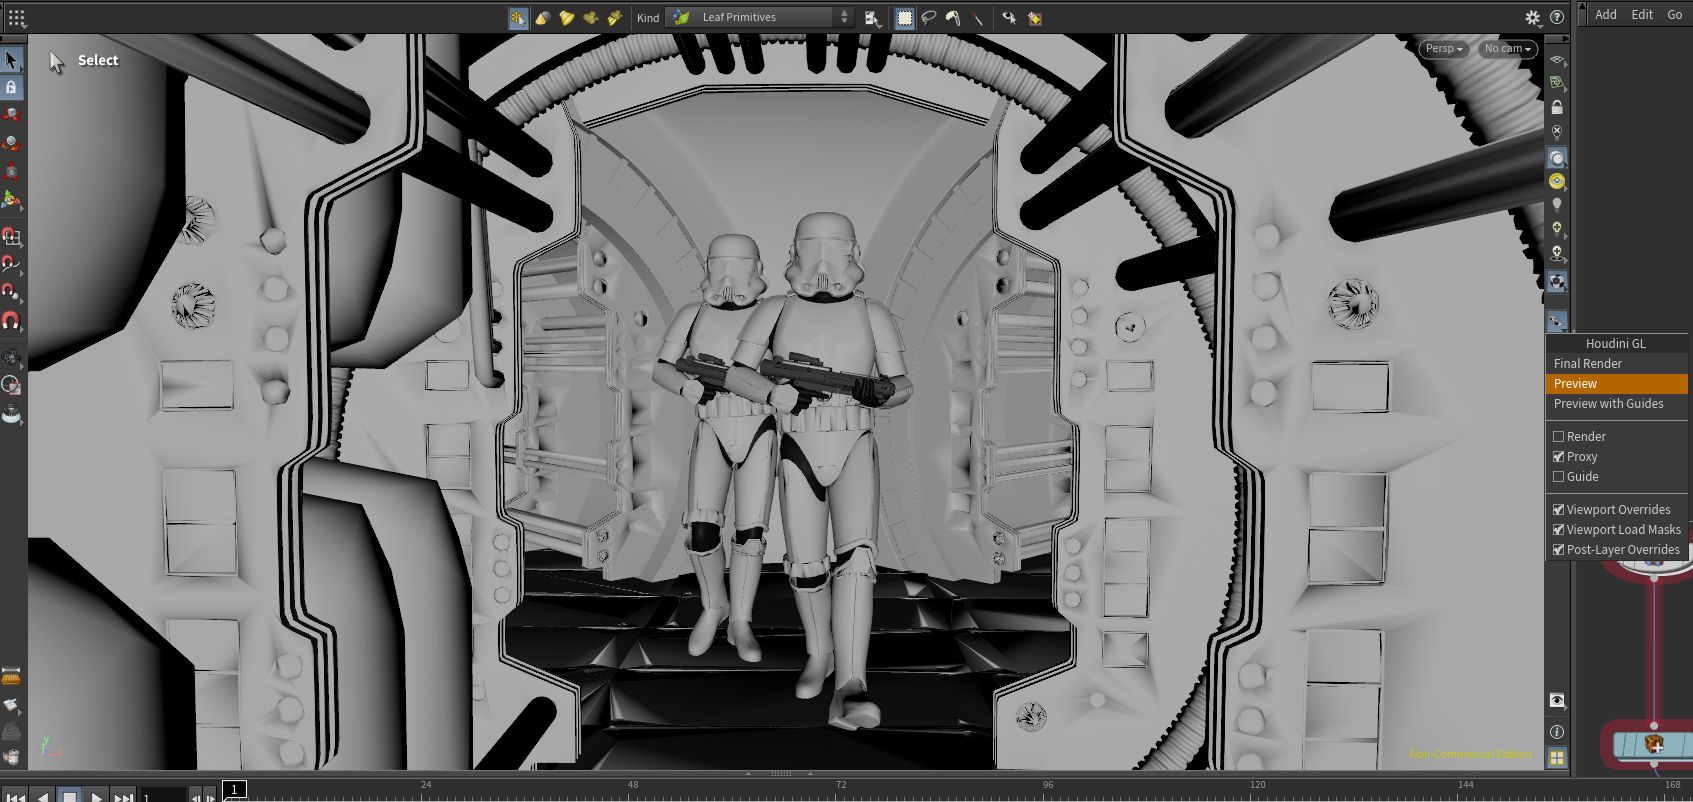
To maximize viewport performance, I used a Proxy model instead of high-resolution geometry for visual feedback.
Fig. A // Houdini GL Viewport (Final Render Payload)
Fig. B // Houdini GL Viewport (Proxy Payload)
10
09 / Render Pipeline
LAYERS &
SETTINGS
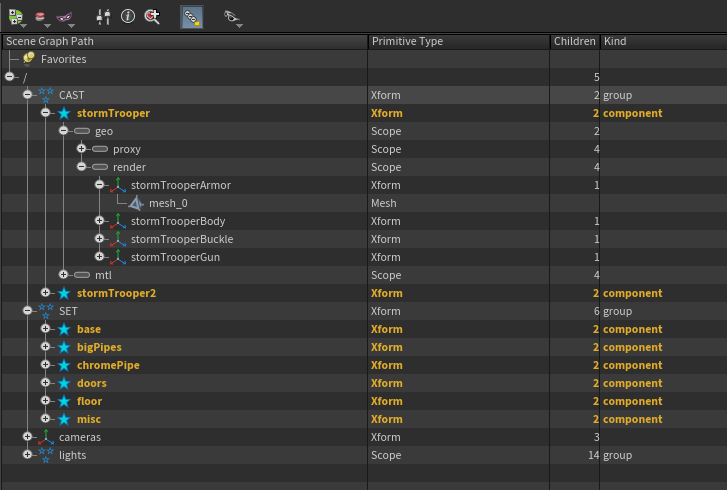
I separated the layers using prim paths, and where post-grouping was needed, I used the Graft Branches node.
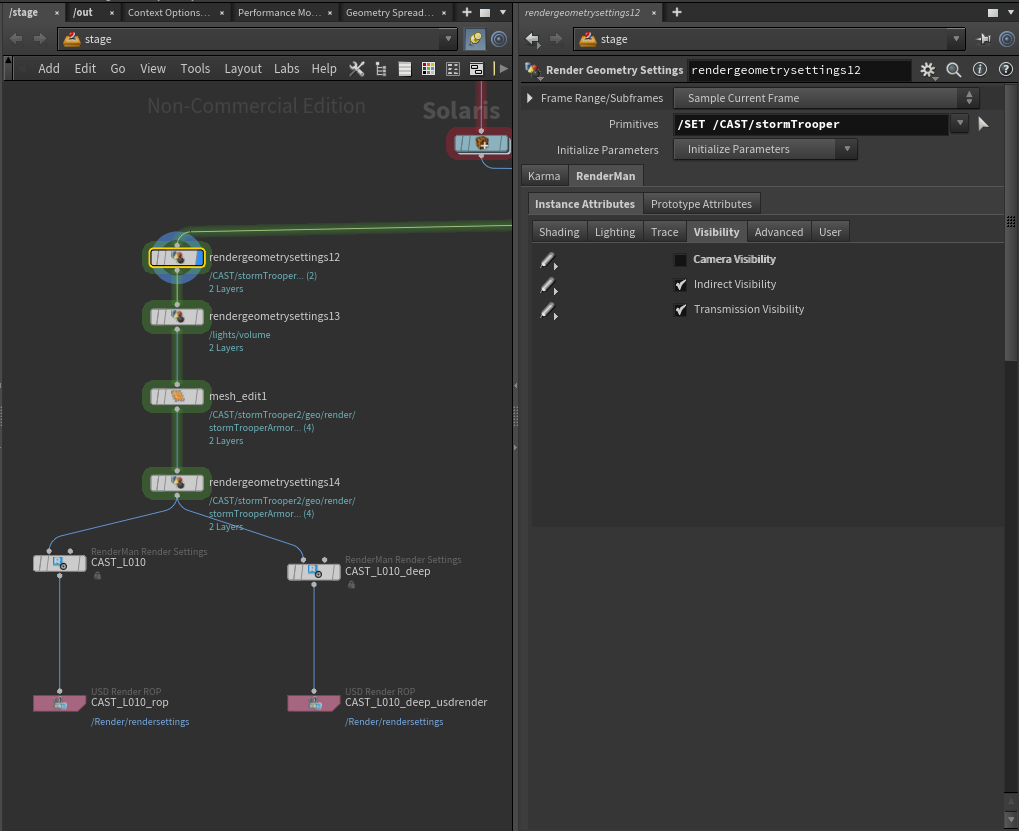
Where I only needed shadow casters, I gathered them in the prim path of a Render Geometry Settings node and simply turned off Camera Visibility on the respective component, e.g., "/Set" and/or "/Cast/stormtrooper/", so these only affect the stormtrooper 2 asset indirectly, as shadow casters.
The CAST elements received a Catmull-Clark subdivision scheme. For the stormtrooper, I set the dicing strategy to Object Distance and the Micropolygon Length to 0.5 to preserve the wrinkles.
Fig. A // Scene Graph Hierarchy & Structure
Fig. B // Render Geometry Settings & Dicing Strategy
11
10 / Custom Render Settings
AOVs &
LPE SETUP
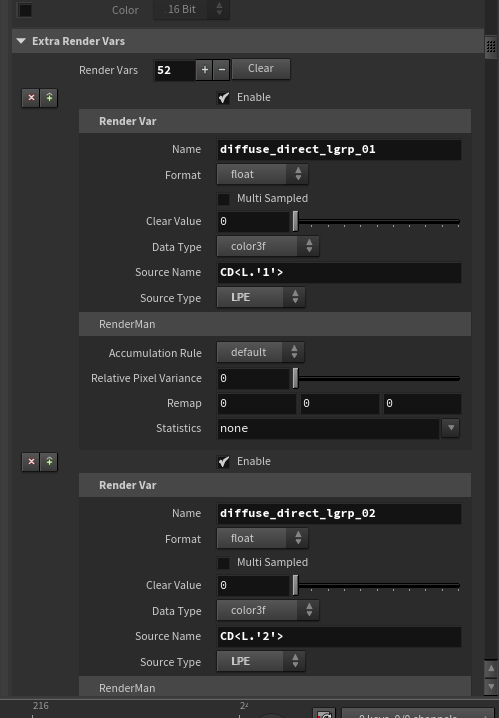
To make compositing easier, I rendered a Deep Data layer without RGB data for each layer. I created extra Render Vars and separated Light Groups in the Render Settings node.
I applied custom LPE expressions: diffuse_direct: CD<L.'1'>; diffuse_indirect: (C<RD>[DS]+<L.'1'>)|(C<RD>[DS]*O); specular_direct: CS<L.'1'>; specular_indirect: (C<RS>[DS]+<L.'1'>)|(C<RS>[DS]*O).
Additionally, I rendered an Albedo pass, which, alongside the Cryptomatte and World Position masks, helped in selecting the appropriate material colors and masking during the final post-production.
Fig. C // Render Settings: LPE & AOV Configuration
12
11 / Automation
DENOISING &
TOPNET
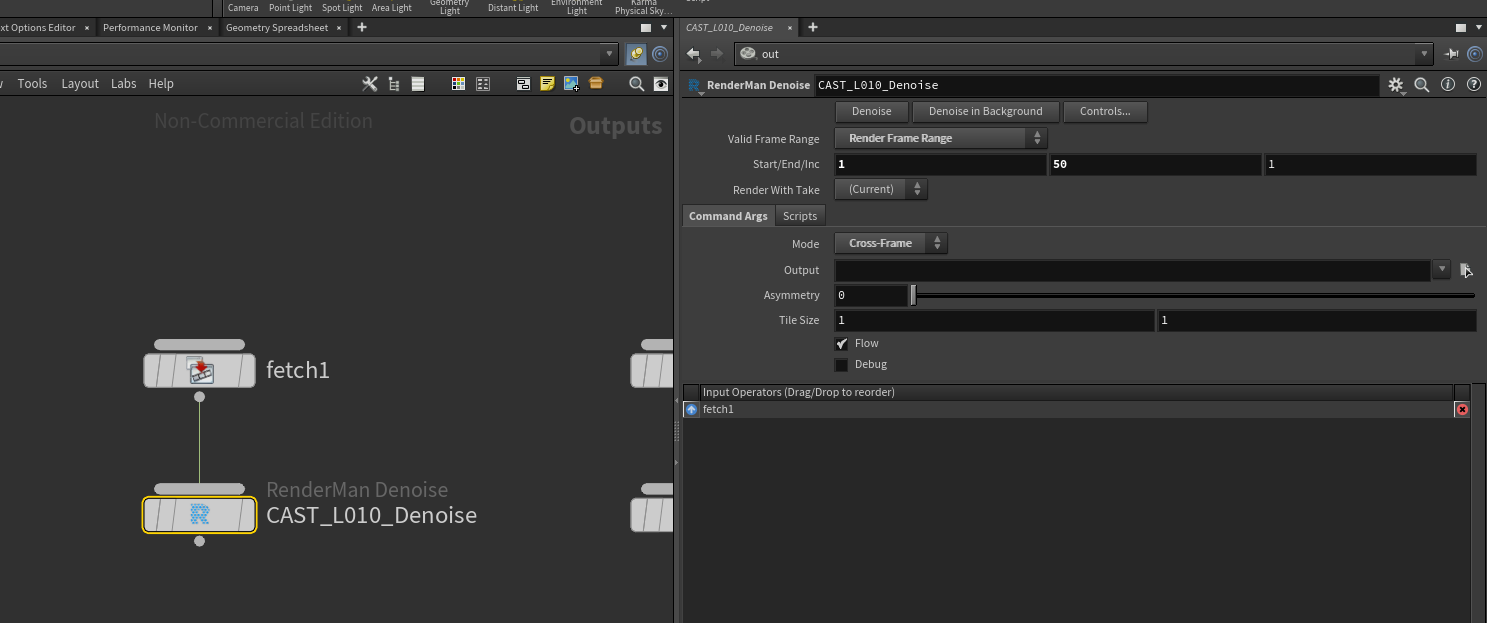
In achieving the final image quality, the RenderMan v26 AI-based cross-frame denoiser system was the greatest advantage. On the `out` stage, I referenced the Render ROP with a Fetch node, followed by a Denoise node.
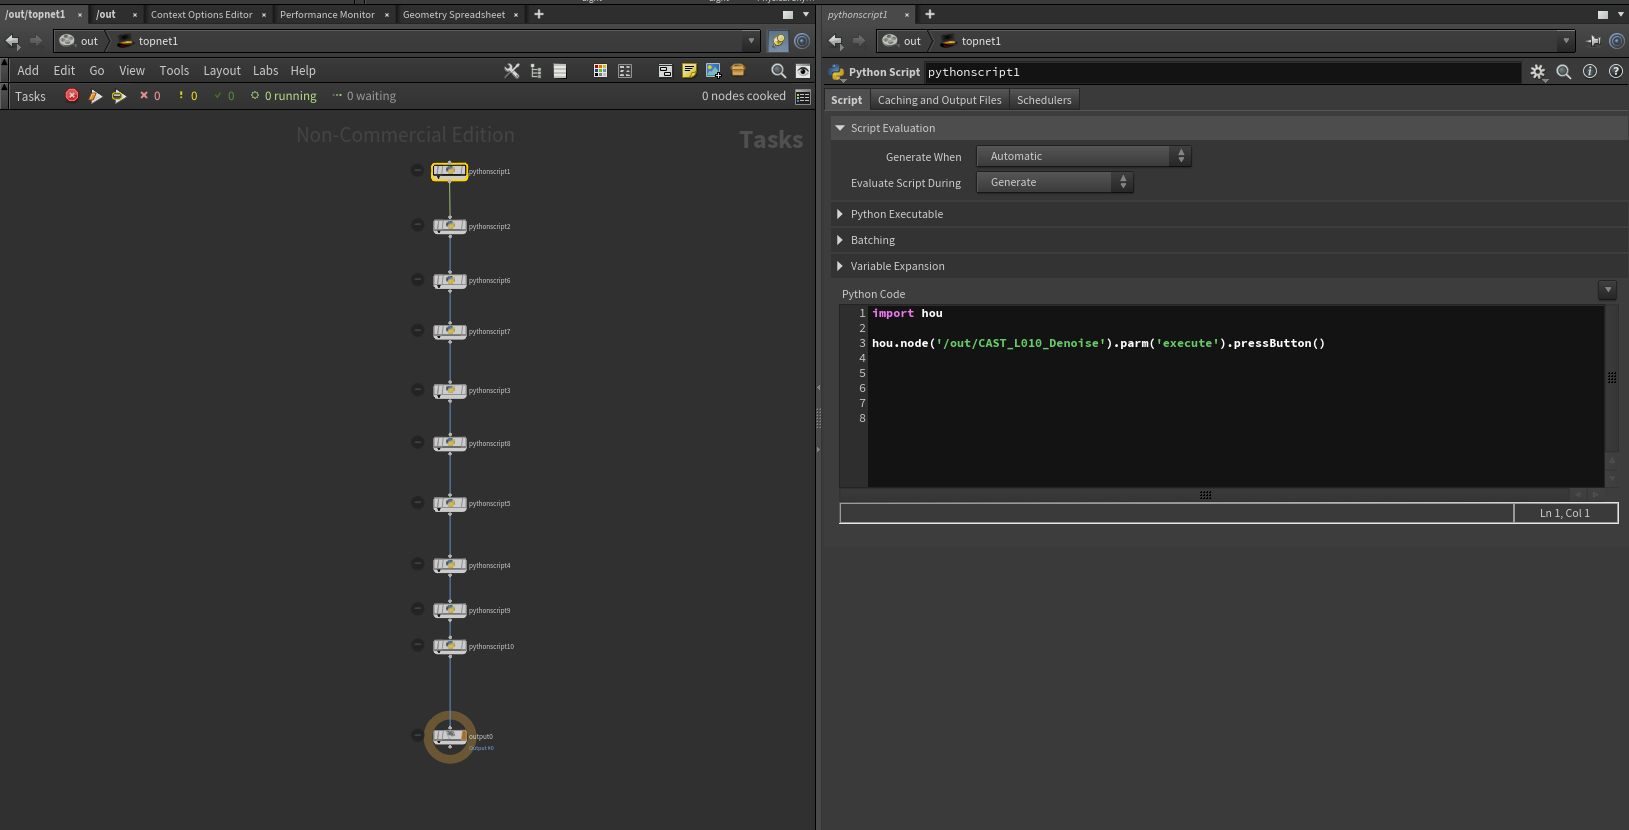
I automated the process within a TOPnet (PDG) network. I chained the tasks together using simple Python scripts, so the network automatically orchestrated the complete render-denoise pipeline.
Fig. A // RenderMan AI Denoiser & Cross-Frame Setup
Fig. B // TOPnet (PDG) Python Script Automation
13
12 / Compositing & Finishing
NUKE COMP /
DEEP PIPELINE
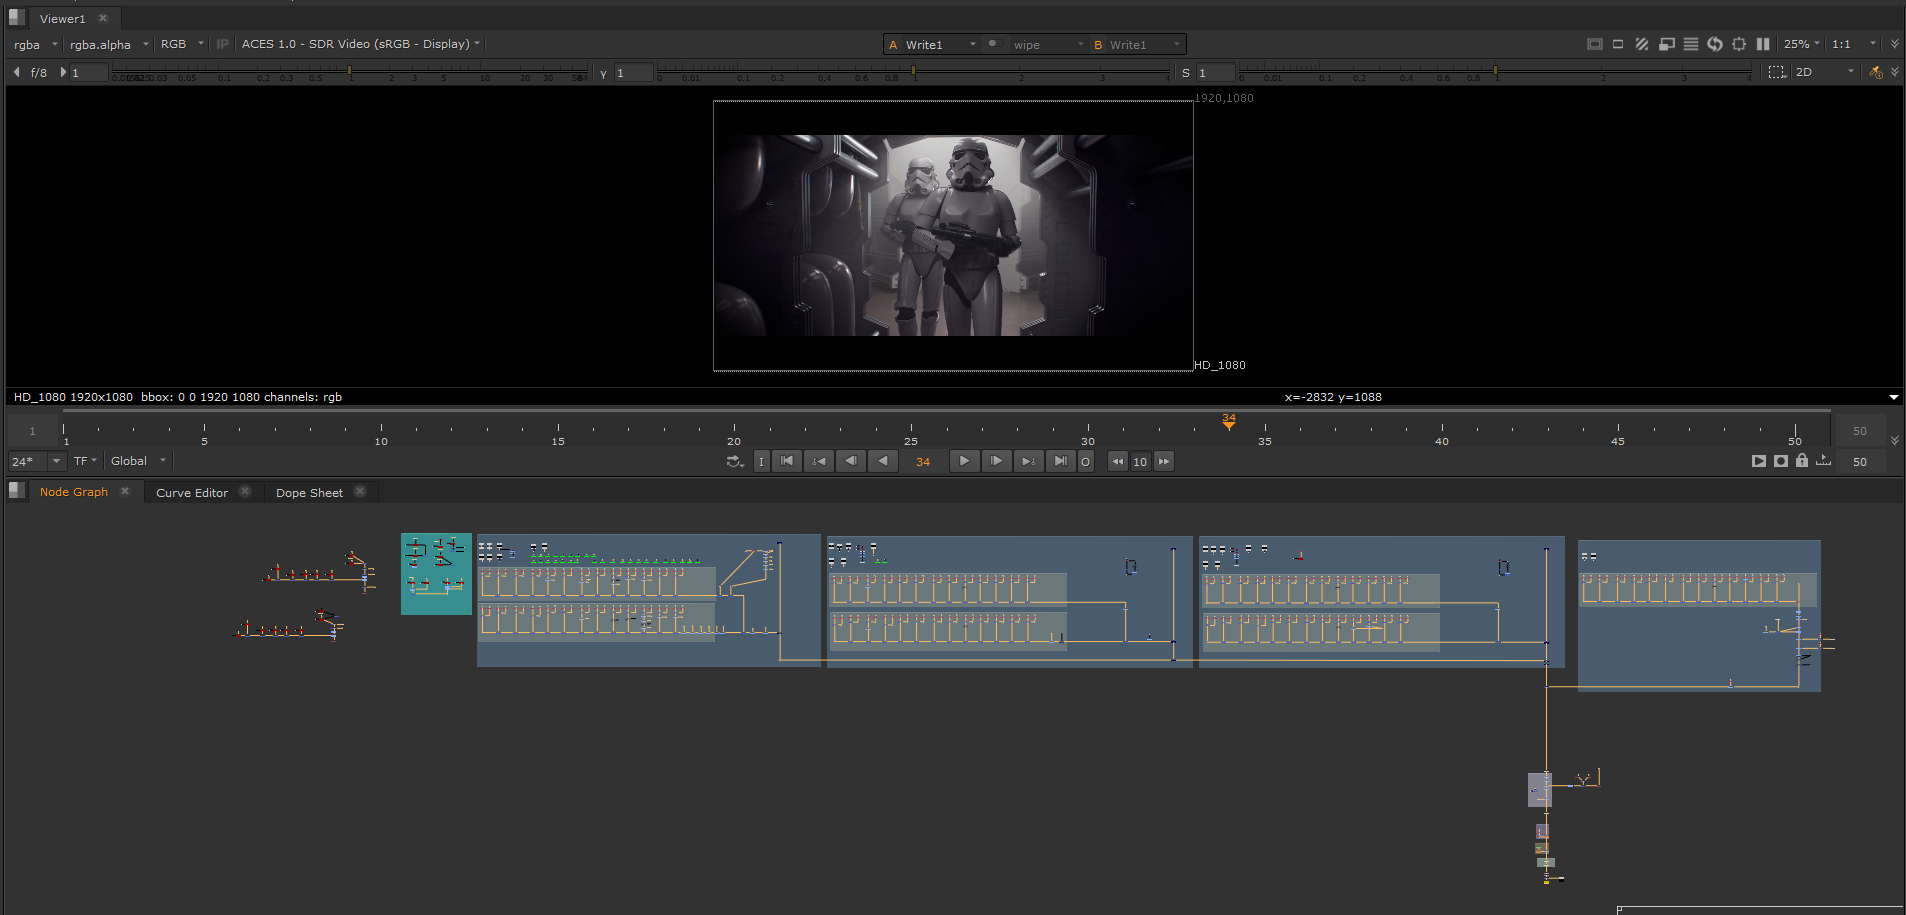
The final phase of the project was compositing done in Nuke, where I combined the layers relying on the Deep workflow. The full node graph (Fig. A) is logically built: moving from left to right, the SET, CAST_L010, CAST_L020, and finally the Volume_L010 layers follow each other.
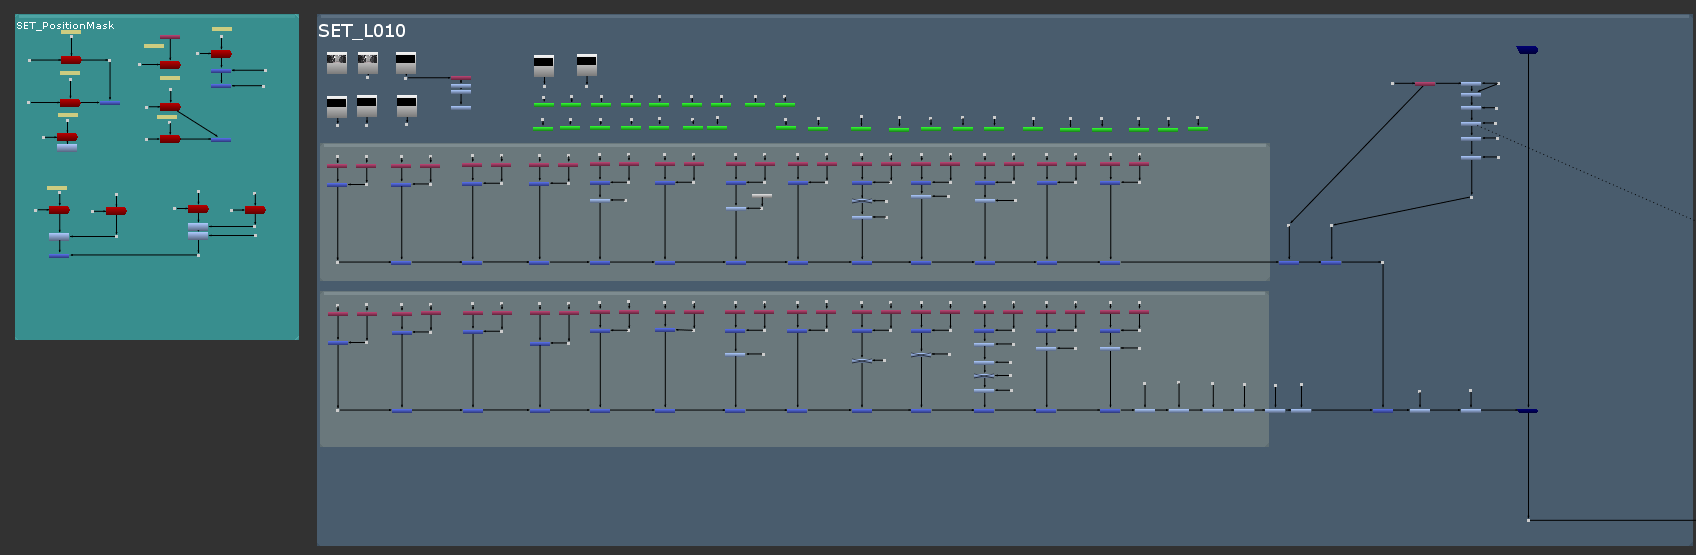
The organization of backdrops helps efficient work: the top row houses the Diffuse Direct and Indirect passes separated into light groups, while the bottom row contains the Specular components in a similar layout. The spatial integration of the layers is performed by DeepCombine nodes.
At the end of the chain, after a DeepToImage conversion, come the final effects: depth-based Depth of Field, Chromatic Aberration, and the Grade operation that finalizes the overall look.
Fig. A // Full Nuke Compositing Tree & Node Organization
Fig. B // SET_L010 Backdrop, Diffuse passes on top and Specular passes on bottom.
14